You will need to use the computer in room 6058 to perform your assignment. Use the login information provided to you in class. Please sign up for the computer on the sheet pasted on the door. It should only take about an hour to compete the exercise.

You will find a folder on the desktop of the computer with your name. If you need save files, please do so here. The original file with proper settings is locked, so you should not be able to alter the original file.
You will be assembling a contig of sequences using the Lasergene suite of programs from DNAstar.
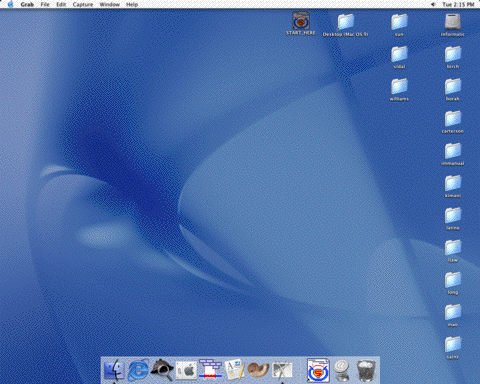
Begin the assembly by clicking on the file that says START_HERE on the desktop. This will launch the SeqMan portion of Lasergene to begin the assembly. You will also find the icons for START_HERE and SeqMan in the dock strip at the bottom of the screen.
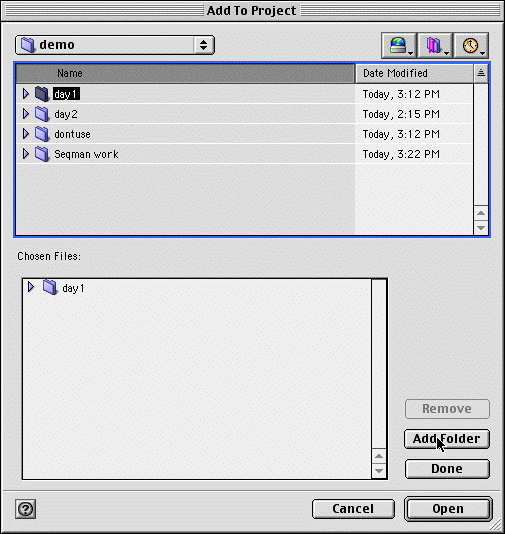
Next select a folder full of sequences to add by Going to the "Sequences" menu and clicking "Add...". The following box should appear. First select the "day1" folder, then click the "Add Folder" button, followed by "Done"
A number of preassembly steps are required to perform the assembly. They will proceed automatically, but it is more informative to go through the steps manually.
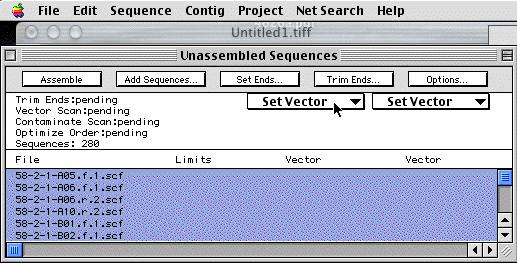
First, we will want to get rid vector sequences. This is the little bit of flanking polylinker that gets read before or after the DNA insert you are trying to sequence. The vector sequence would result in short stretches of sequence that would be nearly identical for all sequence reactions performed with the same universal primer. This would complicate assembly of the sequence. To select a vector sequence to remove, make sure all the sequences are still highlighted in the "Unassembled Sequences" window (If not go to the Edit:Select All Menu). Click on the left "Set Vector" button in the "Unassembled Sequences" window and select pGEM3Zsac.seq, then click on the right vector button and select pGEM3ZBam. This helps filter more of the vector sequence.
Question1: How many sequence files were added from the day1 folder?
Now click on the "Trim ends... " button above the Set Vector button. The "Quality" and "High" buttons should be selected. Click "Scan All". It should say "Searching Now" The program is filtering out poor quality sequence information at the ends of the DNA sequence. You will now notice numbers in the "Limits" column. This is the first and last base of the sequence read that were of High Quality.
Now Click on the "Options" button the options checked will do the end trimming that we just did. It will also begin the stripping of vector sequences and check for contaminant sequences. In this case we will be removing contamination E. coli sequence and also lambda DNA that could have been accidentally cloned into vector during the library construction. Click "Scan All". When the scanning is complete, the preassembly steps are finished. Lets see what happened:
Click on one of the ".scf" file names in the list of sequences. Pick one that has a check mark by the pGEM vector plasmid. This means it contained vector sequences. Go to the "Sequences: Show trace data" menu. A picture of the chromatogram will show. Vector sequences are whited out near one of the ends of the chromatogram. Go to the "Project: Trim Report" menu. You will see something like:
TRIM ENDS
HIGH TRIM PARAMETERS
Trace: Threshold = 16
Non-Trace: Window Size = 70
Maximum Ns = 2
AVERAGE AMOUNT TRIMMED PRE-TRIM
NAME QUALITY TRIMMED LENGTH LENGTH
"58-2-1-A05.f.1.scf" (34>832) 51 33 799 832
"58-2-1-A06.f.1.scf" (4>398) 42 536 395 931
"58-2-1-A06.r.2.scf" (1>805) 53 103 805 908
"58-2-1-A10.r.2.scf" (11>772) 54 10 762 772
"58-2-1-B01.f.1.scf" (2>557) 54 55 556 611
"58-2-1-B02.f.1.scf" (10>592) 52 64 583 647
"58-2-1-B05.f.1.scf" (9>812) 55 8 804 812
"58-2-1-B07.r.2.scf" (6>770) 48 103 765 868
"58-2-1-B12.r.1.scf" (4>861) 54 3 858 861
Describing the average quality of the nucleotides in the read, how much was
trimmed and how much remains.
Assembly
Now Click on the "Assemble" button of the Unassembled Sequences window. The program will begin searching for identical sequence among overlapping random sequence reads and align them. It searches both strands for sequence that is at least 80% identical between reads. Overlapping reads are assembled into contigs.
When the assembly is finished, you will see a group of about 5 contigs. Double-click on one of the larger ones and you will see the alignment of sequences. Conflicting sites are highlighted in red. A consensus sequence it also displayed. You can try to resolve conflicts by clicking on the triangle to the left to show the corresponding region of the chromatogram. In many cases, conflicts arise by improper trimming of the vector sequence, so most conflicts are near the end of individual reads.
The sequence did not yield a complete contig from these reads, but we have more information about these reads which we haven't used yet. The sequences are named according to the clone name and the direction of the sequencing primer used. For example:
"58-2-2-F10.f.1.scf" and "58-2-2-F10.r.1.scf" used the same plasmid as template, but one reaction used a forward universal primer in the sequencing reacts, while the other used the reverse primer. This tells us that these sequences should be fairly close together (1.5 to 3 kb of insert) and that they should be oriented in opposite directions on the final contig. If you highlight contig 9, then go to "Contig:Strategy View" menu, you will see an overview of the sequence. Green arrows are sequence reads form the same plasmid which are pointing towards each other and are 1.5 to 3 kb apart from the ends of the insert. There is a histogram, which indicates how consistent the sequence pairs are with the contig sequence. Reads from plasmid 58-2-10-C10 are shown in red, because the insert size appears to be less than expected.
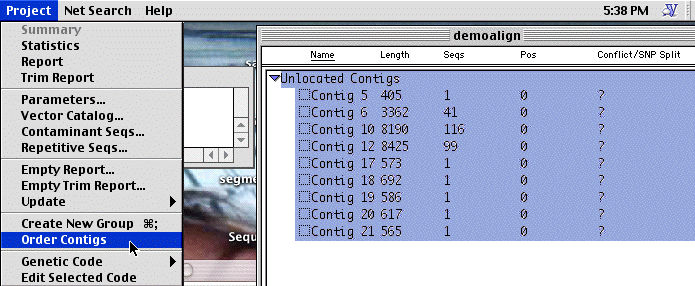
This information can be used to determine the order of contigs, by looking for reads from a single plasmid which appear in 2 different contigs. To do so, select all of the contigs and the select the" Project:Order contigs" menu. You will see a box which tells you this is undoable, just click "Order".
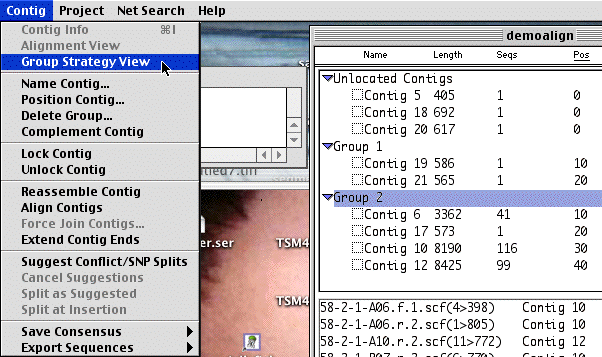
Now you can see that some of the contigs have been grouped together. Select one and select the "Contig:Group StrategyView" menu. This looks similar to the contig Strategy view, but the window shows a cluster of contigs arranged based upon the pairs of reads obtained from individual plasmids. Scroll down to some Blue sequence reads. These are sequences which are derived from a single plasmid which are found in separate contigs. The gap between contigs must be less than the size of one of these inserts. So knowing precisely how big the inserts are on average can tell you precisely how big the gap is.
Question2: How many contigs in the largest group? How big is the largest contig of the group?
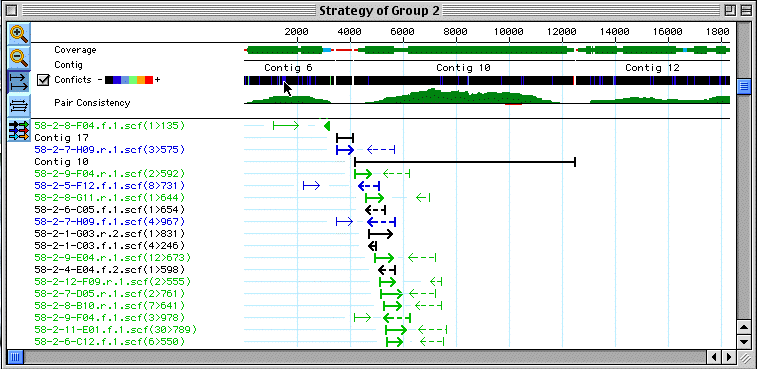
Besides the gaps in the sequence, you can also easily see regions which are well covered by sequence (Fat green bars - at least 4 reads) regions with less than 4 reads (thinner Green bars - at least 2 reads). Regions with info for only one strand, but more than 1 read (blue) and regions with just one read (red line). you can also find conflict sites by checking the conflicts box. Sites where sequences give conflicting data are color coded by severity.
We just need some more data to help stitch together the grouped contigs into a single final contig. Lets do that by adding the sequences from the folder "day2" as we did before with the day1 folder: Go to the "Sequences" menu and click "Add...". First select the "day2" folder, then click the "Add Folder" button, followed by "Done". You should now highlight all the added sequences in the Unassembled Sequences window and again designate the pGEM3Zsac.seq and pGEM3ZBam vectors.
Question3: Were there any sequences left over from the day1 bunch that didn't get added to the assembly? If so, there is probably something wrong with these sequences. Look at the Project: Report Menu and see if you can figure out why some sequences might have been left out. These will no affect the addition of new quences from day2.
You can now go through each of the preassembly steps manually, or just hit "Assemble" and it will proceed automatically through the preassembly step, then assembly. You should now see that the grouped contigs now form a single, long contig.
Question 4: How many contigs do you have now. How long is the longest one?
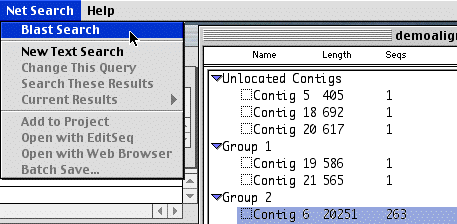
You can highlight a contig and do a blast search by using the "Net Search: Blast Search" menu. You will then see a dialog box which asks which program you wish to use.
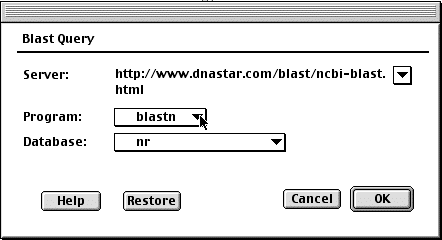
Pick an appropriate program and perform the search on the "nr" database. The results usually take a couple of minutes.
Question5: There are a couple of BLAST programs that you could use. Why
did you pick the one you did?
Question6: Did you BLASt hit show an exact match or a closely related sequence?
What organism is it from?
Question7: Did you remember to logout?